How to Finish Seams Without a Serger: 5 Ways Ranked
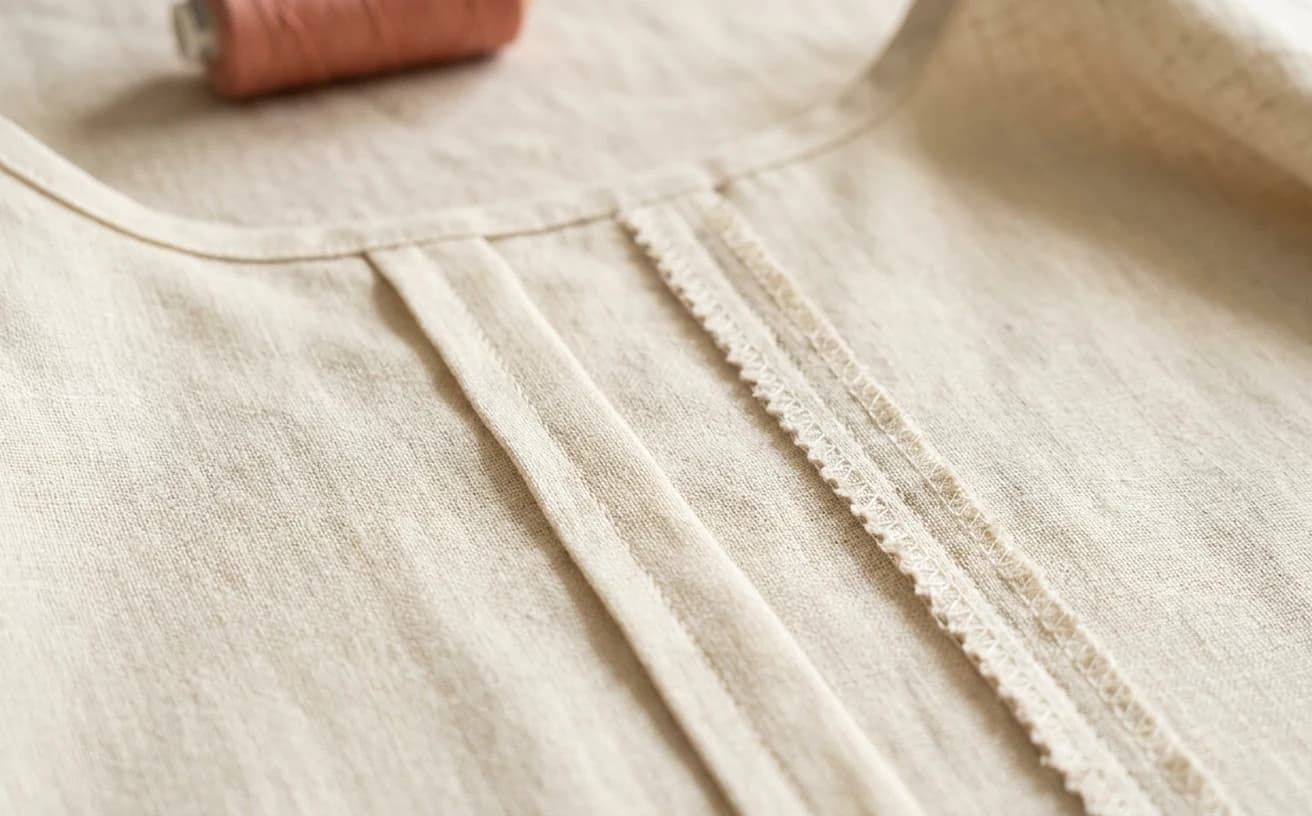
The short version
- A serger is not required. A zigzag or built-in overcast stitch finishes almost any woven edge on a machine you already own, and an overcasting foot keeps the edge from curling.
- Pinking alone does not stop fraying. Ohio State University Extension notes the fabric can still ravel back to the row of stitching, so straight stitch first and pink outside that row.
- A French seam and a flat-felled seam are seams, not edge treatments, so you have to choose them before you sew rather than after.
- A French seam splits your seam allowance across two passes: on a 5/8 inch allowance, sew at 3/8 inch wrong sides together, trim to 1/8 inch, then sew at 1/4 inch right sides together.
- Pressing is half of every finish here. A French seam that is not pressed between its passes will not enclose its own raw edge.
Nothing about a first garment falls apart faster than the inside of it. The seam looked fine on Sunday. By the third wash there is a fringe of loose threads down every allowance and the shoulder seam has quietly lost a couple of millimetres.
The internet's answer to that is buy a serger. You do not need one. Every finish below works on an ordinary home machine — most need nothing more than a straight stitch — and one of them needs no machine at all. They are ranked by effort, because effort is what decides which finish you actually use on a Tuesday evening. This sits at Level 2 of The Pattern, Stitcher.
The five finishes at a glance
| Finish | Effort | Best fabric | Seam allowance needed | Looks like |
|---|---|---|---|---|
| Pinked | 30 seconds | Firm, tightly woven, low-fray | Any | A fine saw-tooth raw edge |
| Zigzag or overcast | 1–2 minutes | Almost any woven, and knits | Any | A soft ridge of thread over the edge |
| Turned and stitched | 3–4 minutes | Light to medium wovens | 1/2 inch or more | A tiny hem inside the garment |
| French seam | 5 minutes | Sheers, lawn, light silks | 1/2 inch minimum | No raw edge at all, a slim clean ridge |
| Flat-felled | 8–10 minutes | Denim, canvas, shirting | 5/8 inch | Two parallel rows of topstitching, like jeans |
Two of these — the French seam and the flat-felled seam — are not edge treatments at all. They are different seams that finish themselves as they go, so you choose them before you sew, not after.
Check your allowance first. Commercial paper patterns are usually drafted at 5/8 inch; indie PDF patterns often use 1/2 inch or 3/8 inch. The number is printed on the pattern, and how to read a sewing pattern covers where. Three of the five finishes below spend that allowance, so knowing it is step zero.
Press before you finish, and press again after
Pressing is half of every finish on this page and the part beginners skip. A French seam not pressed between its two passes will not enclose its own raw edge; a turned-under allowance will not stay turned long enough to stitch; a flat-felled seam is mostly folding, and folding without heat is hoping. Set your iron to the fibre rather than to the technique, and press rather than push it around.
What we'd buy for this
One pick per category, chosen from the research pages linked in this piece. Borrow before you buy — nothing here is required to start.
 Irons
IronsBeautural steam iron$41.99 4.5 out of 5 stars · 19,802 ratings
Priced in the lower half of this category; the listing states a ceramic soleplate; it is a steam iron — pressing seams flat is half of sewing well.
 Pinking Shears
Fri4Free$6.99 4.7 out of 5 stars · 1,440 ratings
An inexpensive first pair — 9-inch hardened stainless blades that cut five teeth per inch; the listing describes a soft inner ring in each handle for grip.
 Sergers & Overlockers
Brother 1034D$319.99 4.6 out of 5 stars · 12,166 ratings
A first serger you can actually thread — colour-coded upper guide and lower looper threading, a metal frame, 3 or 4 threads, and by a wide margin the deepest owner-review record in this category.
Researched from listings, specs and owner feedback — never hands-on testing. We may earn a commission; it never changes a pick.
1. Pinked seams — thirty seconds, and honest about what it is
What it is. You cut the raw edge with pinking shears, which leave a saw-tooth edge. A cut on the bias frays less readily than a cut on the straight grain, so pinking slows fraying rather than stopping it.
When to use it. When the garment will not be washed hard, when the fabric barely frays anyway, or when a turned-under allowance would add bulk you cannot afford — Grainline Studio recommends pinking for tightly woven stable fabrics and curved edges for that last reason.
Fabric it suits. Firm quilting cotton, poplin, wool suiting, felt. Not linen, not rayon challis, not anything loosely woven.
Seam allowance needed. None extra. You lose about an eighth of an inch to the cut.
Steps.
- Sew and press the seam as normal.
- Optional but much better: straight stitch about 1/4 inch from each raw edge.
- Trim each allowance with pinking shears, just outside that row.
- Press.
The mistake beginners make. Treating pinking as fray-proofing. Ohio State University Extension is blunt about it in its 4-H seam finish sheet: the stitched-pinked seam is not a commonly used finish, because the fabric can still ravel back to the row of stitching. The stitching is what stops it. Skip that row and pinking is decoration.
2. Zigzag — and the overcast stitch that quietly beats it
What it is. A zigzag worked along the raw edge so the thread wraps the last few fibres. Most modern machines also carry a dedicated overcast or overlock stitch, which alternates a straight stitch with a slanted one and sits much closer to what a serger produces.
When to use it. Your default — the finish that handles most of what you sew, on the machine you already own.
Fabric it suits. Almost any woven, and knits. Very fine, very drapey fabrics are the exception — a zigzag pulls them into a curled rope.
Seam allowance needed. Any. It costs nothing.
Steps.
- Press the seam open, or press both allowances to one side to finish them together.
- Set a medium-width, medium-length zigzag, or select the overcast stitch.
- Sew so the right-hand swing of the needle lands just off the fabric edge.
- Trim any whiskers poking through.
An overcasting foot makes this much easier: it carries a small bar or brush that the fabric edge rides against, so the stitch cannot tunnel the edge inward. Brother's own instructions for overcasting foot G say to lower the foot with the guide set flush against the edge of the fabric, and they carry a warning worth repeating: use only a stitch approved for that foot, and turn the handwheel by hand for one full stitch to confirm the needle clears it. Many machines ship with an overcasting foot in the box; if yours did not, it is the cheapest useful thing in presser feet. Ordinary all-purpose polyester thread is right for all of this — heavy topstitch thread in a zigzag will stiffen a light edge.
The mistake beginners make. Too wide, too fast. A wide zigzag on light fabric drags the edge into a tube no amount of pressing flattens. Go narrower and slower, and test on a scrap of the actual fabric first. With no zigzag at all — a vintage straight-stitch machine, or no machine — overcast the edge by hand with a whipstitch. Slow, and completely legitimate: see basic hand sewing stitches.
3. Turned and stitched — the clean finish
What it is. Each raw edge is folded under a fraction and stitched down, so the allowance becomes a tiny hem. Also called a clean finish or an edge-stitched seam.
When to use it. On an unlined garment whose inside will be seen. It is lovely and it is slow.
Fabric it suits. Light to medium wovens, and coarse weaves and tweeds where a zigzagged edge would still shed. Not thick fabric — the doubled allowance prints a ridge onto the right side.
Seam allowance needed. 1/2 inch or more, since you spend about 1/8 inch on the fold.
Steps.
- Press the seam open.
- Fold one raw edge under by about 1/8 inch and press.
- Stitch close to that fold.
- Repeat on the other allowance.
The mistake beginners make. Doing it on a curve, where the folded edge has to ease or it ripples — and the ripple shows through. Keep it for straight side seams and zigzag the armholes.
4. The French seam — no raw edge anywhere
What it is. The seam that finishes itself. You sew it once with the wrong sides together, trim, fold the fabric the other way and sew again — the second pass wraps the first one's raw edges inside a narrow tube. Nothing raw survives.
When to use it. On anything sheer, anything that frays as you look at it, and anything whose inside shows through its outside.
Fabric it suits. Sheers, cotton lawn, voile, light silks, light linen — In The Folds notes it works best on light to midweight fabrics prone to fraying. Not denim, not canvas, not a lined coat.
Seam allowance needed. 1/2 inch minimum. In The Folds recommends adding 2 mm to the pattern edge when it only gives you 1 cm.
Steps — this is the version for a standard 5/8 inch allowance, following Grainline Studio's breakdown by seam allowance:
- Pin the pieces wrong sides together and sew at 3/8 inch.
- Trim the allowance to roughly 1/8 inch and pick off loose threads, or they will show through the finished seam.
- Press the seam to one side, then fold the fabric so the pieces are now right sides together with the seam exactly on the fold. Press that fold hard.
- Sew at 1/4 inch, which encloses the trimmed edges.
- Press the finished seam to one side.
On a 1/2 inch allowance, both passes are 1/4 inch, with the first trimmed back to about 1/8 inch before you turn it. The rule underneath: the two passes together must add up to your allowance, and the first is trimmed so the second can enclose it.
The mistake beginners make. Sewing the first pass right sides together out of habit, which produces an ordinary seam with the raw edges still out. Say wrong sides first out loud. Next most common is puckering on a curve; In The Folds' fix is to unpick 2–3 cm either side of the pucker, release it, press and restitch that short stretch rather than the whole seam.
A pair of pyjama shorts is a good first French-seamed garment: long straight side seams, no armholes, forgiving fabric. Cloth napkins are the gentler warm-up for the fold and the press.
5. The flat-felled seam — the one on your jeans
What it is. A seam folded over itself and topstitched flat, so both raw edges are locked inside and the outside shows two parallel rows of stitching. Much the strongest finish here, which is why work clothing has used it for a century.
When to use it. Jeans, shirts, outerwear, tote bags — anything that takes strain, gets washed hot, or is seen from both sides. Denim, canvas, twill, shirting and flannel all take the hard press it needs.
Seam allowance needed. 5/8 inch. Less than that and there is nothing to fold.
Steps.
- Sew the seam. Wrong sides together puts the felled ridge outside, the way jeans do it; right sides together hides it inside.
- Trim one allowance to about 1/4 inch.
- Fold the untrimmed allowance in half over the trimmed one so the raw edge tucks under. Press.
- Edgestitch along that fold, close and straight.
OSU Extension's 4-H standard is a useful target for how tight the result should be: no more than 5/16 inch between the two rows of stitching. An edge-stitching or blind-hem foot from presser feet makes that second row far easier to keep parallel.
The mistake beginners make. Attempting it on a tight curve, like a set-in sleeve head, before doing a few straight ones. If a curve must be felled, Grainline's mock flat fell is the merciful version: zigzag one edge, trim the other to 1/4 inch, press both to one side so the finished edge covers the trimmed one, and topstitch 1/4 inch from the seam.
What r/sewing actually reaches for
The recurring answer in the r/sewing threads on finishing without a serger is not one technique but a routine: the built-in overlock or overcast stitch with an overcasting foot for everyday garments, French seams kept for blouses and lingerie-weight fabric, a flat-felled or mock-felled seam on flannel shirts and jeans, bias binding saved for the pieces someone wanted pretty inside. Nobody there argues a zigzag is beautiful; plenty argue it is sufficient, which it is. The community's own go-to seam finish thread has the flavour of it.
When you have genuinely outgrown all five
You have outgrown them when you sew knits regularly, or sew in volume. A serger stitches the seam, trims the allowance and overcasts the edge in one pass, and University of Kentucky Extension's serger buying guide puts the speed at roughly 1,700 stitches per minute against a conventional machine's 600. The same guide is clear about what it does not do: it does not replace a sewing machine, because zips, buttonholes, topstitching and pressed-open seams still need one. That is the honest frame for the purchase, and the argument in serger vs sewing machine; the machines live in sergers.
Until then: pink the quilting cotton, zigzag most things, French-seam the pretty ones, fell the jeans. Wonky seams are the whole point — unravelling ones are not.
Seams finished? Here is the kit that makes the next one faster, and the seam to try next.
Frequently asked
Do I need a serger to finish seams?
No. Every finish in this guide is done on an ordinary sewing machine, and hand overcasting needs no machine at all. A serger is a speed and volume tool rather than a requirement: University of Kentucky Extension's serger guide puts it at roughly 1,700 stitches per minute against a conventional machine's 600, and the same guide is clear that a serger does not replace a sewing machine, because zips, buttonholes, topstitching and pressed-open seams still need one.
What is a French seam used for?
A French seam encloses both raw edges inside the seam itself, so nothing raw is left to fray and nothing shows through from the wrong side. It suits sheer and lightweight fabrics that fray readily, such as chiffon, voile, cotton lawn and light silks, and it is the standard finish on an unlined blouse where the inside of the garment is visible through the outside. It is the wrong choice for denim, canvas or anything you may need to let out later.
Can you zigzag instead of serging?
Yes, and for most beginner sewing it is the sensible default. A zigzag set to medium width and length, sewn so the right-hand swing of the needle lands just off the fabric edge, wraps the last few fibres and stops them shedding. If your machine has a dedicated overcast or overlock stitch, use that instead, because it sits closer to a serged edge. The result is less tidy than a serger but does the same job.
What seam allowance do I need for a French seam?
At least 1/2 inch. In The Folds recommends adding 2 mm to the pattern edge when a pattern only gives you 1 cm. On a standard 5/8 inch allowance, Grainline Studio's split is 3/8 inch for the first pass with wrong sides together, trimmed back to about 1/8 inch, then 1/4 inch for the second pass with right sides together. On a 1/2 inch allowance, both passes are 1/4 inch, with the same trim in between.
Are pinked seams good enough?
Only on firmly woven fabric that barely frays, and only with a row of straight stitching about 1/4 inch from the edge for the pinking to trim outside of. Ohio State University Extension's 4-H seam finish sheet describes the stitched-pinked seam as not commonly used, because the fabric can still ravel back to that row of stitching. On linen, rayon challis or anything loosely woven, choose a zigzag or an enclosed seam instead.
Which seam finish is strongest?
The flat-felled seam. Both raw edges are folded inside and locked down by two rows of stitching, which is why jeans, work shirts and outerwear use it. It needs a 5/8 inch seam allowance and a fabric that takes a hard press, and it is difficult on tight curves. Ohio State University Extension's target for a tidy result is no more than 5/16 inch between the two rows of stitching.
Prices and StitchScores reflect our most recent research and refresh on a cycle — confirm the live price before buying. We may earn a commission from affiliate retailers; it never changes what we recommend. See how we score gear.
Read next
How to Bind a Quilt: Strips, Corners and a Neat Finish
Learn to bind a rectangular quilt: calculate strips with diagonal join loss, sew mitered corners, join the tails, and choose a hand or machine finish.
How to Sew a Christmas Stocking: Draft Your Own Pattern
Draw your own boot-shaped stocking template in any size, then sew a lined stocking with a cuff and a hanging loop. No PDF download, no printer needed.