Machine Embroidery Appliqué: Step by Step, Stop by Stop
Tools this guide uses
Embroidery Stabilizer · New brothread Cut Away Stabilizer$25.99 4.8 out of 5 stars · 5,530 ratings
Cut-away under the base fabric, the safe default for anything worn and washed.
Fabric Scissors · Gingher 4-Inch Lightweight Embroidery Scissors$16.99 4.5 out of 5 stars · 326 ratings
Small, sharp scissors for trimming close to the tack-down line.
Irons · Beautural steam iron$41.99 4.5 out of 5 stars · 19,802 ratings
To fuse the web to the back of the appliqué fabric: medium heat, no steam.
Researched, not hands-on tested. We may earn a commission; it never changes a pick.
The short version
- An appliqué design uses colour changes as pauses: placement line, tack-down, then cover stitch. The colour order sheet is your step list.
- Trim-in-place forgives a wobbly cut and is the place to start; pre-cut suits intricate shapes and blanket-stitch finishes.
- Fusible web on the back of the appliqué fabric stops fraying and bubbling. Cut the piece at least an inch bigger than the outline.
- Take the hoop off the machine to trim, but never take the fabric out of the hoop until the design is finished.
- Trim close for a satin edge; leave about an eighth of an inch for a bean stitch or raw edge.
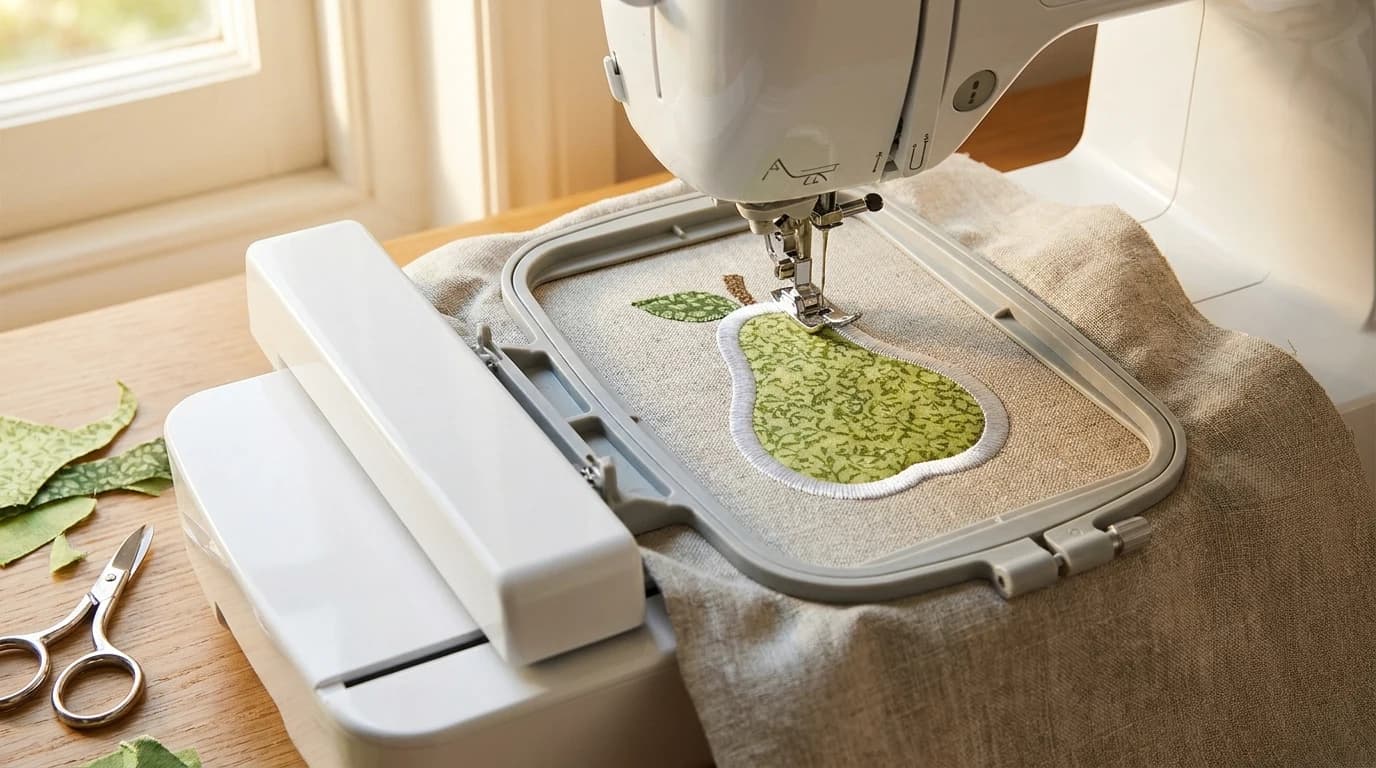
Appliqué on an embroidery machine is a conversation with pauses in it. The machine stitches a little, stops, and waits for you to do something with fabric or scissors. Then it carries on. Learn what each pause is asking for and the rest is the machine's job.
This assumes you have stitched a few ordinary designs already. If not, machine embroidery for beginners covers hooping and test stitch-outs first.
How the design file tells you what to do
An appliqué design is digitized as separate colours on purpose. Anita Goodesign's appliqué guide puts it neatly: the colour change is what makes the machine stop and wait for you. The colour order sheet that comes with the design is your step list.
| Stop | The machine sews | Then you |
|---|---|---|
| 1. Placement line | A single outline of the shape on the base fabric | Lay the appliqué fabric over it, covering the line on every side |
| 2. Tack-down | A line that fastens the fabric down | Take the hoop off the machine and trim the excess |
| 3. Cover stitch | A satin, zigzag, blanket or bean stitch over the cut edge | Nothing, unless there is another piece |
OESD's trim-in-place tutorial names the same stops "Placement Stitch", "Cut Line & Tackdown" and "Cover Stitch". Embroidery Library's classic appliqué project calls the first line a dieline. The names change; the order does not.
The finish decides the look. Satin covers the cut edge completely. Anita Goodesign describes bean stitch as a heavy running stitch that lets the edge fray gently, on purpose.
Trim in place, or cut first?
There are two ways to make the shape, and Bernina's appliqué ebook names both:
- Trim in place. The fabric is cut during stitching, round the tack-down line. Start here: it forgives a wobbly cut because the cover stitch hides the edge.
- Pattern, or pre-cut. The shape is cut before stitching and placed inside the placement line. Bernina recommends it for intricate shapes, which are easier to cut from a pattern than to trim round in the hoop, and under a blanket-stitch finish, where the tack-down could otherwise show.
A cutting machine makes pre-cut practical. Some designers ship cut files alongside the stitch file; Sweet Pea's ScanNCut guide suggests enlarging the shape slightly, often by 2mm, so it is a little bigger than the placement line.
Prepare the appliqué fabric
Most designers back the appliqué fabric before it goes near the hoop. Anita Goodesign recommends a lightweight fusible web ironed to the back: it stops fraying, keeps the fabric from bubbling under the tack-down, and makes a clean trim easier. Cut the piece at least an inch bigger than the outline on every side.
If you use HeatnBond Lite, Therm O Web's instructions say a medium iron with no steam, and that pieces bonded with it must be sewn for a permanent hold. Appliqué does exactly that. Any steady iron will do.
When not to fuse: Kimberbell's appliqué tips skip the backing for raw-edge appliqué and under open decorative stitches, where it can show through.
Embroidery Library takes a different route: medium-weight cut-away stabilizer sprayed with temporary adhesive on the back of the fabric. Both work. Fusible web is the easier one to learn on.
What we'd buy for this
One pick per category, chosen from the research pages linked in this piece. Borrow before you buy — nothing here is required to start.
 Irons
IronsBeautural steam iron$41.99 4.5 out of 5 stars · 19,802 ratings
Priced in the lower half of this category; the listing states a ceramic soleplate; it is a steam iron — pressing seams flat is half of sewing well.
 Embroidery Stabilizer
New brothread 100$9.99 4.8 out of 5 stars · 14,514 ratings
Priced in the lower half of this category.
 Fabric Scissors
Proshear$8.99 4.8 out of 5 stars · 4,040 ratings
The least expensive pick in this category, which makes it the low-risk way to find out whether you'll keep at it; the handles are the ergonomic style, which matters more than it sounds once you are cutting out a whole garment.
Researched from listings, specs and owner feedback — never hands-on testing. We may earn a commission; it never changes a pick.
Stabilize the base fabric
The fabric you stitch onto needs its own backing, chosen the usual way. Embroidery Library's tea towel appliqué uses one piece of medium-weight cut-away. For a sweatshirt, its sweatshirt guide also uses cut-away, and says to wash and dry the sweatshirt first to preshrink it.
Cut-away is the safe default under appliqué, because a satin border on a washed garment is exactly the dense, worn design it exists for. The stabilizer guide has the fabric-by-fabric detail, and the stabilizer shelf has both main types.
Step by step
- Hoop the base fabric and stabilizer together, snug and smooth.
- Stitch the placement line. The machine stops.
- Lay the appliqué fabric right side up, covering the line with room to spare. Anita Goodesign says an undersized piece stretched to cover the line is the most common beginner frustration.
- Stitch the tack-down. Hold the fabric gently as it sews. Anita Goodesign suggests slowing to about 600 stitches per minute for this and the finish.
- Take the hoop off the machine. Leave the fabric in the hoop. OESD, Bernina and Brother all say so, and Anita Goodesign explains why: unhooping shifts the alignment, and the cover stitch then misses the edge.
- Trim the excess close to the tack-down, with the hoop flat on the table.
- Put the hoop back and stitch the cover stitch, then any detail colours.
- Unhoop and trim the stabilizer on the back, leaving about half an inch round the design.
How close to trim
The sources disagree, and the disagreement is useful:
| Source | Says |
|---|---|
| OESD, Bernina | As close to the line as possible |
| Sweet Pea | 1 to 2mm away, any closer risks cutting the stitching |
| Anita Goodesign | Within an eighth of an inch |
| Kimberbell | Close for a satin edge; about an eighth of an inch for raw edge |
Our reading: the finish decides. A satin border has to cover the cut edge completely, so trim close. A bean stitch or raw-edge finish is meant to show a little fabric, so leave the eighth of an inch.
Small, sharp scissors make the job; dull ones leave a ragged edge, according to Anita Goodesign. The Gingher 4-inch embroidery scissors are the small pair on our fabric scissors shelf. Kimberbell's case for duckbill appliqué scissors is that the duckbill blade lifts the fabric away from the stitches. It also warns about the angle: tilt the blade and you get a bevelled edge.
If you do snip the cut line, OESD notes that the tack-down inside it still holds the piece.
When it goes wrong
| What you see | Likely cause | Next time |
|---|---|---|
| Threads poking out past the satin | Trimmed too far out, or piece too small | Cut bigger, trim closer |
| Bobbin thread showing at the edge | Bobbin matched to the base fabric | Match the bobbin to the appliqué colour |
| Bubble under the tack-down | Fabric not held, or no fusible web | Fuse it; hold it gently; slow down |
| Piece came loose | Cut inside the cutting line | Keep the cut outside the tack-down |
| Gap between edge and satin | Fabric unhooped mid-design | Keep it hooped until the last stitch |
The bobbin fix is from Anita Goodesign. The loose-piece warning is from Brother's appliqué instructions, which use a pre-cut method.
Appliqué, in the hoop and freestanding
These terms get blurred. OESD's freestanding appliqué tutorial separates them: freestanding lace is thread and wash-away stabilizer only, while freestanding appliqué adds fabric. In-the-hoop projects build a whole item, such as a key fob or coaster, inside the hoop. Freestanding appliqué and many in-the-hoop designs use the same placement, tack-down and trim stops you learned here.
Frequently asked
Do I need fusible web for machine appliqué?
It is not compulsory, but most design companies recommend it because it stops fraying and keeps the fabric from bubbling under the tack-down. Kimberbell skips it for raw-edge appliqué and open decorative stitches, where it can show. Embroidery Library uses cut-away stabilizer and spray adhesive instead.
Can I take the fabric out of the hoop to trim appliqué?
No. Take the hoop off the machine arm, but leave the fabric clamped in it. Unhooping shifts the alignment, and the cover stitch then lands beside the edge instead of on it.
What scissors are best for trimming appliqué?
Small, sharp scissors, kept for the job. Curved or duckbill appliqué scissors help: Kimberbell says the duckbill blade lifts the fabric away from the stitches. Dull blades leave a ragged edge that the satin stitch cannot hide.
What stabilizer goes under appliqué?
Choose it for the base fabric. Embroidery Library uses one piece of medium-weight cut-away under a tea towel and cut-away on sweatshirts. Cut-away is the safe default for anything that will be worn and washed.
Sources & further reading
Where our guidance rests on a fact, here is where that fact comes from.
- Anita Goodesign — Learn how to create appliqué — Colour stops, fusible web, oversized pieces, stitching speed, bobbin colour.
- OESD — Trim-in-place appliqué tutorial — Stop names; remove the hoop, not the project from the hoop.
- OESD — Pre-cut appliqué tutorial — Fusible, paper-backed appliqué stabilizer.
- OESD — Freestanding appliqué tutorial — Freestanding lace versus freestanding appliqué.
- Bernina — Just Embroider It: machine appliqué (PDF) — Pattern versus trim-in-place methods and when to use each.
- Embroidery Library — Classic appliqué embroidery — Dieline, tack-down and cut-away-backed appliqué fabric.
- Embroidery Library — Multi-piece appliqué tea towel — Medium-weight cut-away under a tea towel; trimming the back.
- Embroidery Library — Embroidering on sweatshirts — Preshrink first; cut-away with spray adhesive.
- Kimberbell — All about appliqué — When to skip backing, duckbill scissors, trim distance by finish.
- Sweet Pea — Trimming in-the-hoop appliqué — Trim 1 to 2mm from the stitching.
- Sweet Pea — Cutting appliqué pieces on a ScanNCut — Cut files and enlarging the shape by about 2mm.
- Therm O Web — HeatnBond Lite — Iron settings; bonded pieces must be sewn.
- Brother — Appliqué patterns (online manual) — Pre-cut method; a piece cut inside the line may not attach.
Prices and StitchScores reflect our most recent research and refresh on a cycle — confirm the live price before buying. We may earn a commission from affiliate retailers; it never changes what we recommend. See how we score gear.
Read next
Embroidery Stabilizer Guide: Which Type for Which Fabric
Cut-away, tear-away, wash-away or sticky: which embroidery stabilizer each fabric needs, what weight to buy, and where the makers disagree.
Magnetic Embroidery Hoops: Do You Need One, and Which Fits
What a magnetic embroidery hoop changes and what it does not, which frames fit common Brother, Baby Lock and Janome machines, and the safety rules.